Fabricademy Final Project – Textile Bioplastic composite – Fabricks

Fabricademy Final Project – Main
Fabricademy Final Project – Textile Bioplastic composite – Structures
Fabricks : Samples with threads and shredded fabrics
Throughout the process, I maintained that I would like to use all kinds of textile waste to create my textile composites.
In the process of looking at companies like Kvadrat & Really, I liked the idea to make it smooth. In a moment of inspiration, a few weeks after having baked some of the very first composite tests using the cornstarch bioplastic recipe and waste threads, I decided to see what would happen if I sanded a sample.
This worked and led me on to sanding many more samples containing different kinds of waste textiles.
In the last 2 images, I also managed to UV print onto a textile composite via a workshop with the digital printing company Roland.
Fabricks: using lasercut shredded waste
Based on the steps from Fabricademy Final Project – Textile Waste – Processing Textiles, I went onto create some of the best textile composites (or at least the ones I’m most proud of).
- Make bio-binder recipe (Bicarbonate Soda, Cornstarch, H2O & Lasercut textile waste)
- Add in laser-cut textile (dampened)
- Let to dry
- Bake at 150
- Let for 2 weeks (possibly under weight)
- Sand into a block or desired shape
- Paint with clear beeswax
“Bake it into shape”
I really wanted to use the technique of moulding for my project, but it was only a last minute decision to add in the Fabricademy of Textile Scaffold and therefore make a mould.
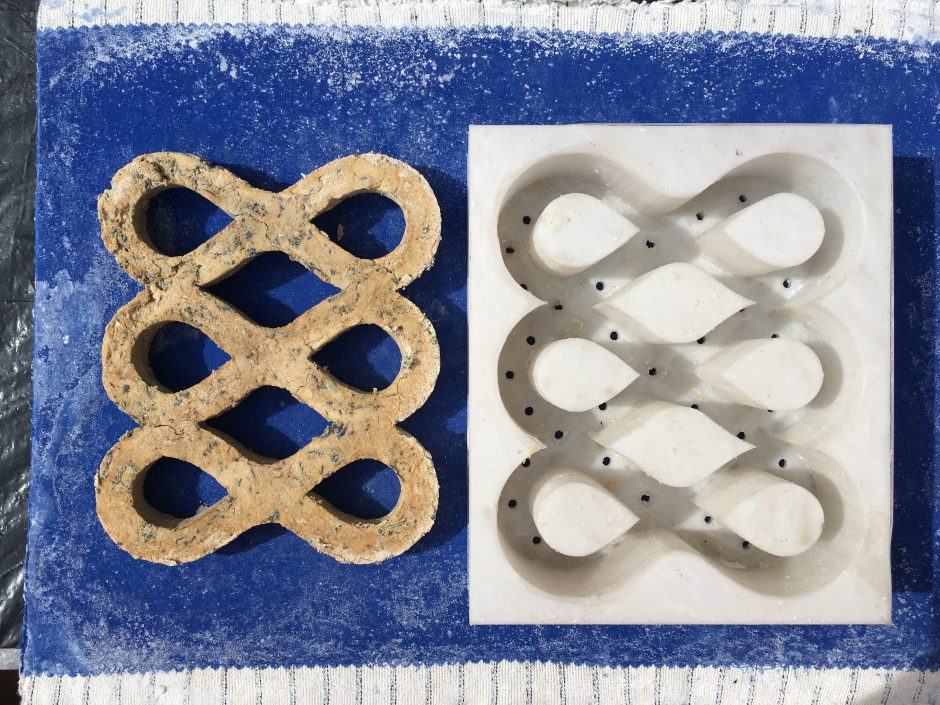
The 888 honeycomb mould came from looking at the structure tests, but also the idea that I could make a modular shape which would connect the poles.

Here you can see I design a mould on Rhino and 3D printed it in PLA filament. I had first tried using Filaflex, but due to machine issue, this didn’t work (but created some spectacular arty 3D prints instead)
Using the recipe as the Fabricks above, I made Fabrick “worms” and pushed them into the mould. I let this dry in the sunlight and then tapped the piece out of teh mould. I then lay this on my silicone baking tray and baked it for 30-40 mins.
Afterwards I sanded the 888 honeycomb design and coated with clear beeswax. I used the mould in my final design.
Strength Tests


Recent Comments