Fabricademy Week 3: Circular open source fashion – Modular

This weeks subject of creating a modular pattern is something that I have always thought about using for waste textiles and making them into designs.
I really enjoyed transforming the (pineapple) felt fabric, which I also chose for my final experiment, as well as incorporating both the positive and negative cut pattern into useable modular pieces of my designs. I’m hoping to use this technique for one of the stages in my final piece.
Global Tutor: Zoe Romano
In this class the lecture will outline the systems behind fashion and the textile industry, focusing on alternative systems such as circular fashion, agile fashion, open value chains.
The focus will be on creating modular elements, structures and connections that allow the user to change the shape of a garment, resize it or replace certain elements. Students will publish their creations on open source platforms and learn how to monitor and promote their creations in a distributed network.
Lecture slides
Program outline
-
Intro teacher
-
Circular fashion
-
Hacking the fashion system
-
Agile fashion
-
Modular elements
-
Modular seams
-
References
-
Tools/software
2d drawing software
-
illustrator, rhino3d & grasshopper
-
valentina project
-
openfitlab
-
laser cutter
Materials
Sealing textiles, synthetic textiles that melt and seal the edges of the cut outs vegetable tanned leather (chrome tanned leather is toxic when heated) felt, natural and synthetic (preferably PLA or other biodegradable felts) neoprene (check for composition that no toxic particle/fumes will be released when heated)
Assignment
The students will have to design and fabricate a modular reconfigurable system or seamless garments. The soft connection can be designed to be implemented in the assembly of a garment, being applied on the seams or it can be designed as single elements that act as construction parts of a garment.
The whole process needs to be documented on the personal webpage.
Their task is to upload their open source file, accompanied by a manual of materials and a tutorial of how to make it and track its life throughout the whole course. Keep metrics of it while the duration of the course, use social media to share and track its spreading,.
How will it be evaluated?
document how soft interlocking connection has been designed and fabricated how the connection either creates a full garment or has been applied to the seams show that the connection is well designed and holds the pull/stretch of a garment include all downloadable files in your documentation
Sketches and testing with Inkscape
My inspiration for my design came from a coffee meeting, or more specifically the packaging of a coffee capsules box. The capsules are organised within the box by a very simple curved tab design. i saw similarities between this and the modular shapes from the lecture. I also wondered what happens to all these little shapes! (that project is to be continued!)
I began to play around the tracing and tessellating the form, I then wondered about changing the corners to become a pointier shape, completely dissolving the curves altogether. It was at this stage I realised I wanted to create a modular design which graduated over the length of the fabric it was cut from.
Inkscape, was one of the recommended Open Source design programs for us to download as students, an alternative to the market leading Adobe Illustrator. I also made a mini flipagram video here
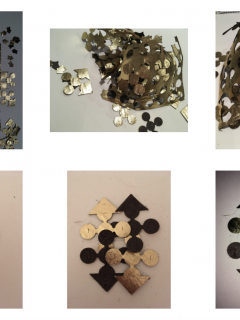
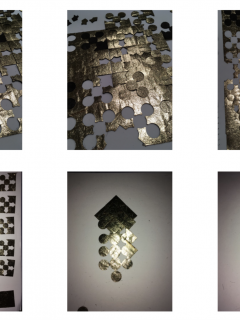
Modular tests
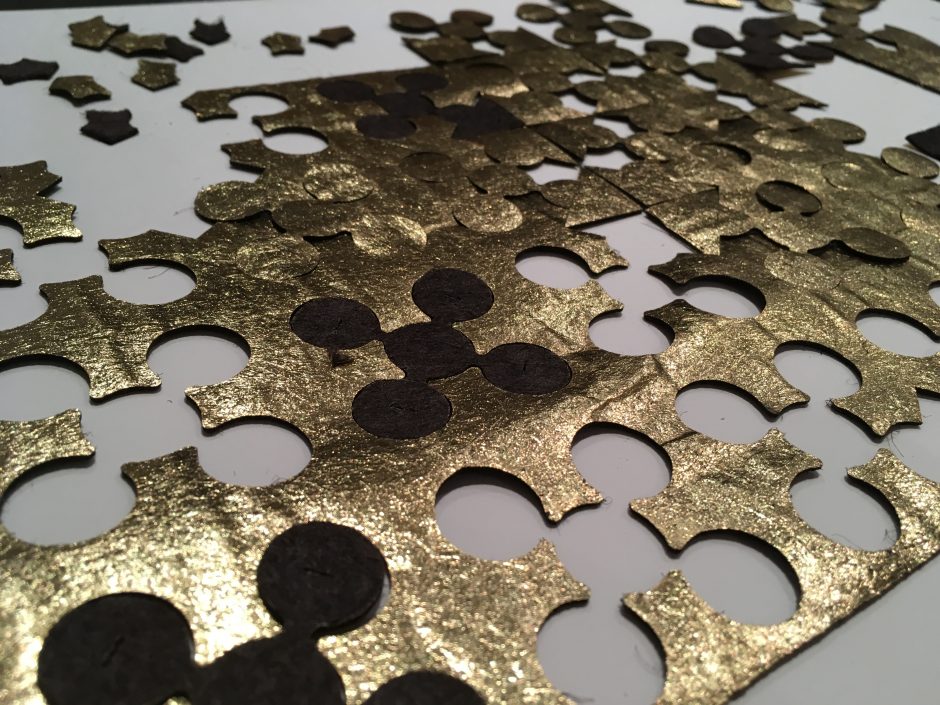
Whilst working on the digital designs I began to experiment with material and started first with paper and then felt (pineapple felt). Here are a few of my experiments showing my interest in not only connecting the form, but also trying to make it a 3D object and give it shape.
Designs into Lasercut fabric
https://www.troteclaser.com/en/applications/textiles/
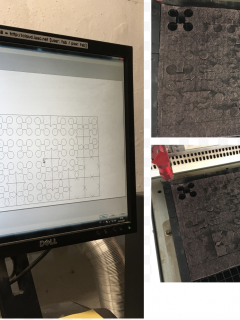
Learning a new program: My first tests with Rhino3D
Though I appreciate illustrator software, I really wanted to create a design which was more exact and that I could use and adapt to any type of surface or application. Many of the architecture students at IAAC and also FabLab use Rhino3D and since we were going to be using it in the future, I decided to use the program to draw out my original design.
It is tricky getting used to using a 3D CAD software, but you get used to the layout and it and I’ve really come to like designing in it. It’s my go to now! Here are some screenshots of the next stage of my design process. I used some of the simpler design commands such as mirror, rotate, copy, move, split. I found that I could use the program like a virtual sketchbook, repeating processes and creating automatic backups of steps, organising my work and visuals how I wanted to.
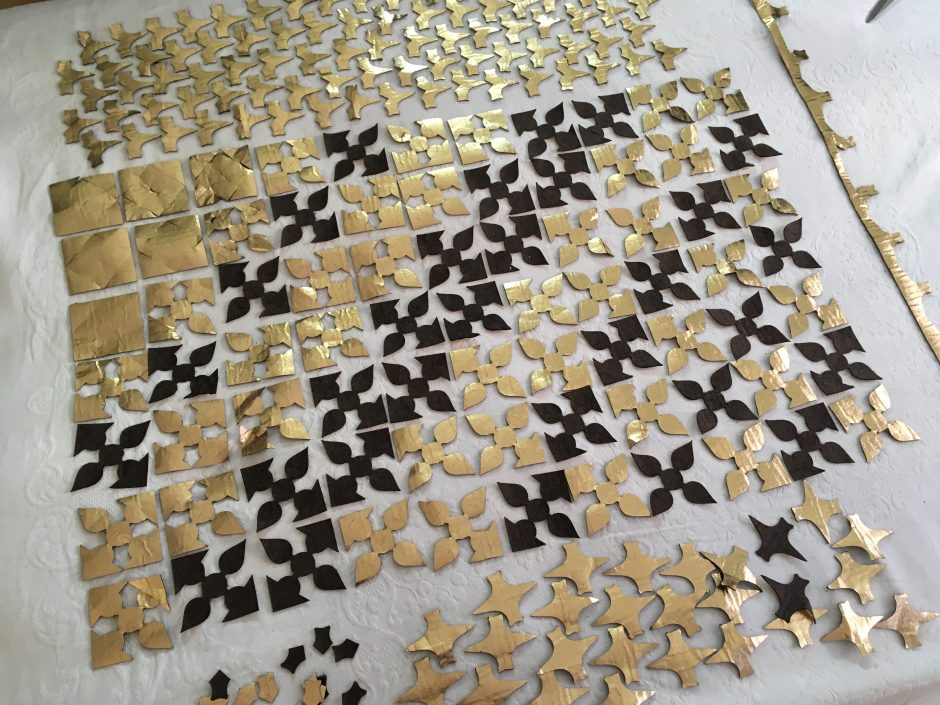
Next I edited my design down to the size of the lasercut bed and they began the process. I found it useful to have a board close to the machine so that I could take of the lasered fabric in one go. NOTE: as the pineapple laminated felt was very thick and uneven in some areas, the laser did not cute through it perfectly in all places. So I decided to actually roll up the fabric into one pice so it transported better. It took a little while to cut the badly lasered pieces out, the curves were the worst!
Progression from flat modular to shaping on the body
I would say the process took me a few hours to complete, but as you can see, I like to record the stages and my progression should I want to recreate this in the future. I also was not sure what I wanted to create as a final garment and so I decided to let the process of connecting the pieces help me decide. I quickly found that I was creating a form to feel the shoulders, back and neck area of the body.
Next phase: Finishing the piece as a garment… or changing it entirely?
At this stage I have two options:
- To finish the garment as a wearable shoulder piece and incorporate the remaining pieces and fabric I have from the lasercutting process.
- To undo certain sections and create something new.
I may go with a combination of the two finally as I am intrigued to see what other forms and textures this design could make.
Final project
I would like to use a modular design system in my final project as I am continuing to focus on textile waste.
If you’d like to talk to me about this or any of my other projects, you can get in touch with contact form below:
Recent Comments